
3
0
0
决策树概论
决策树
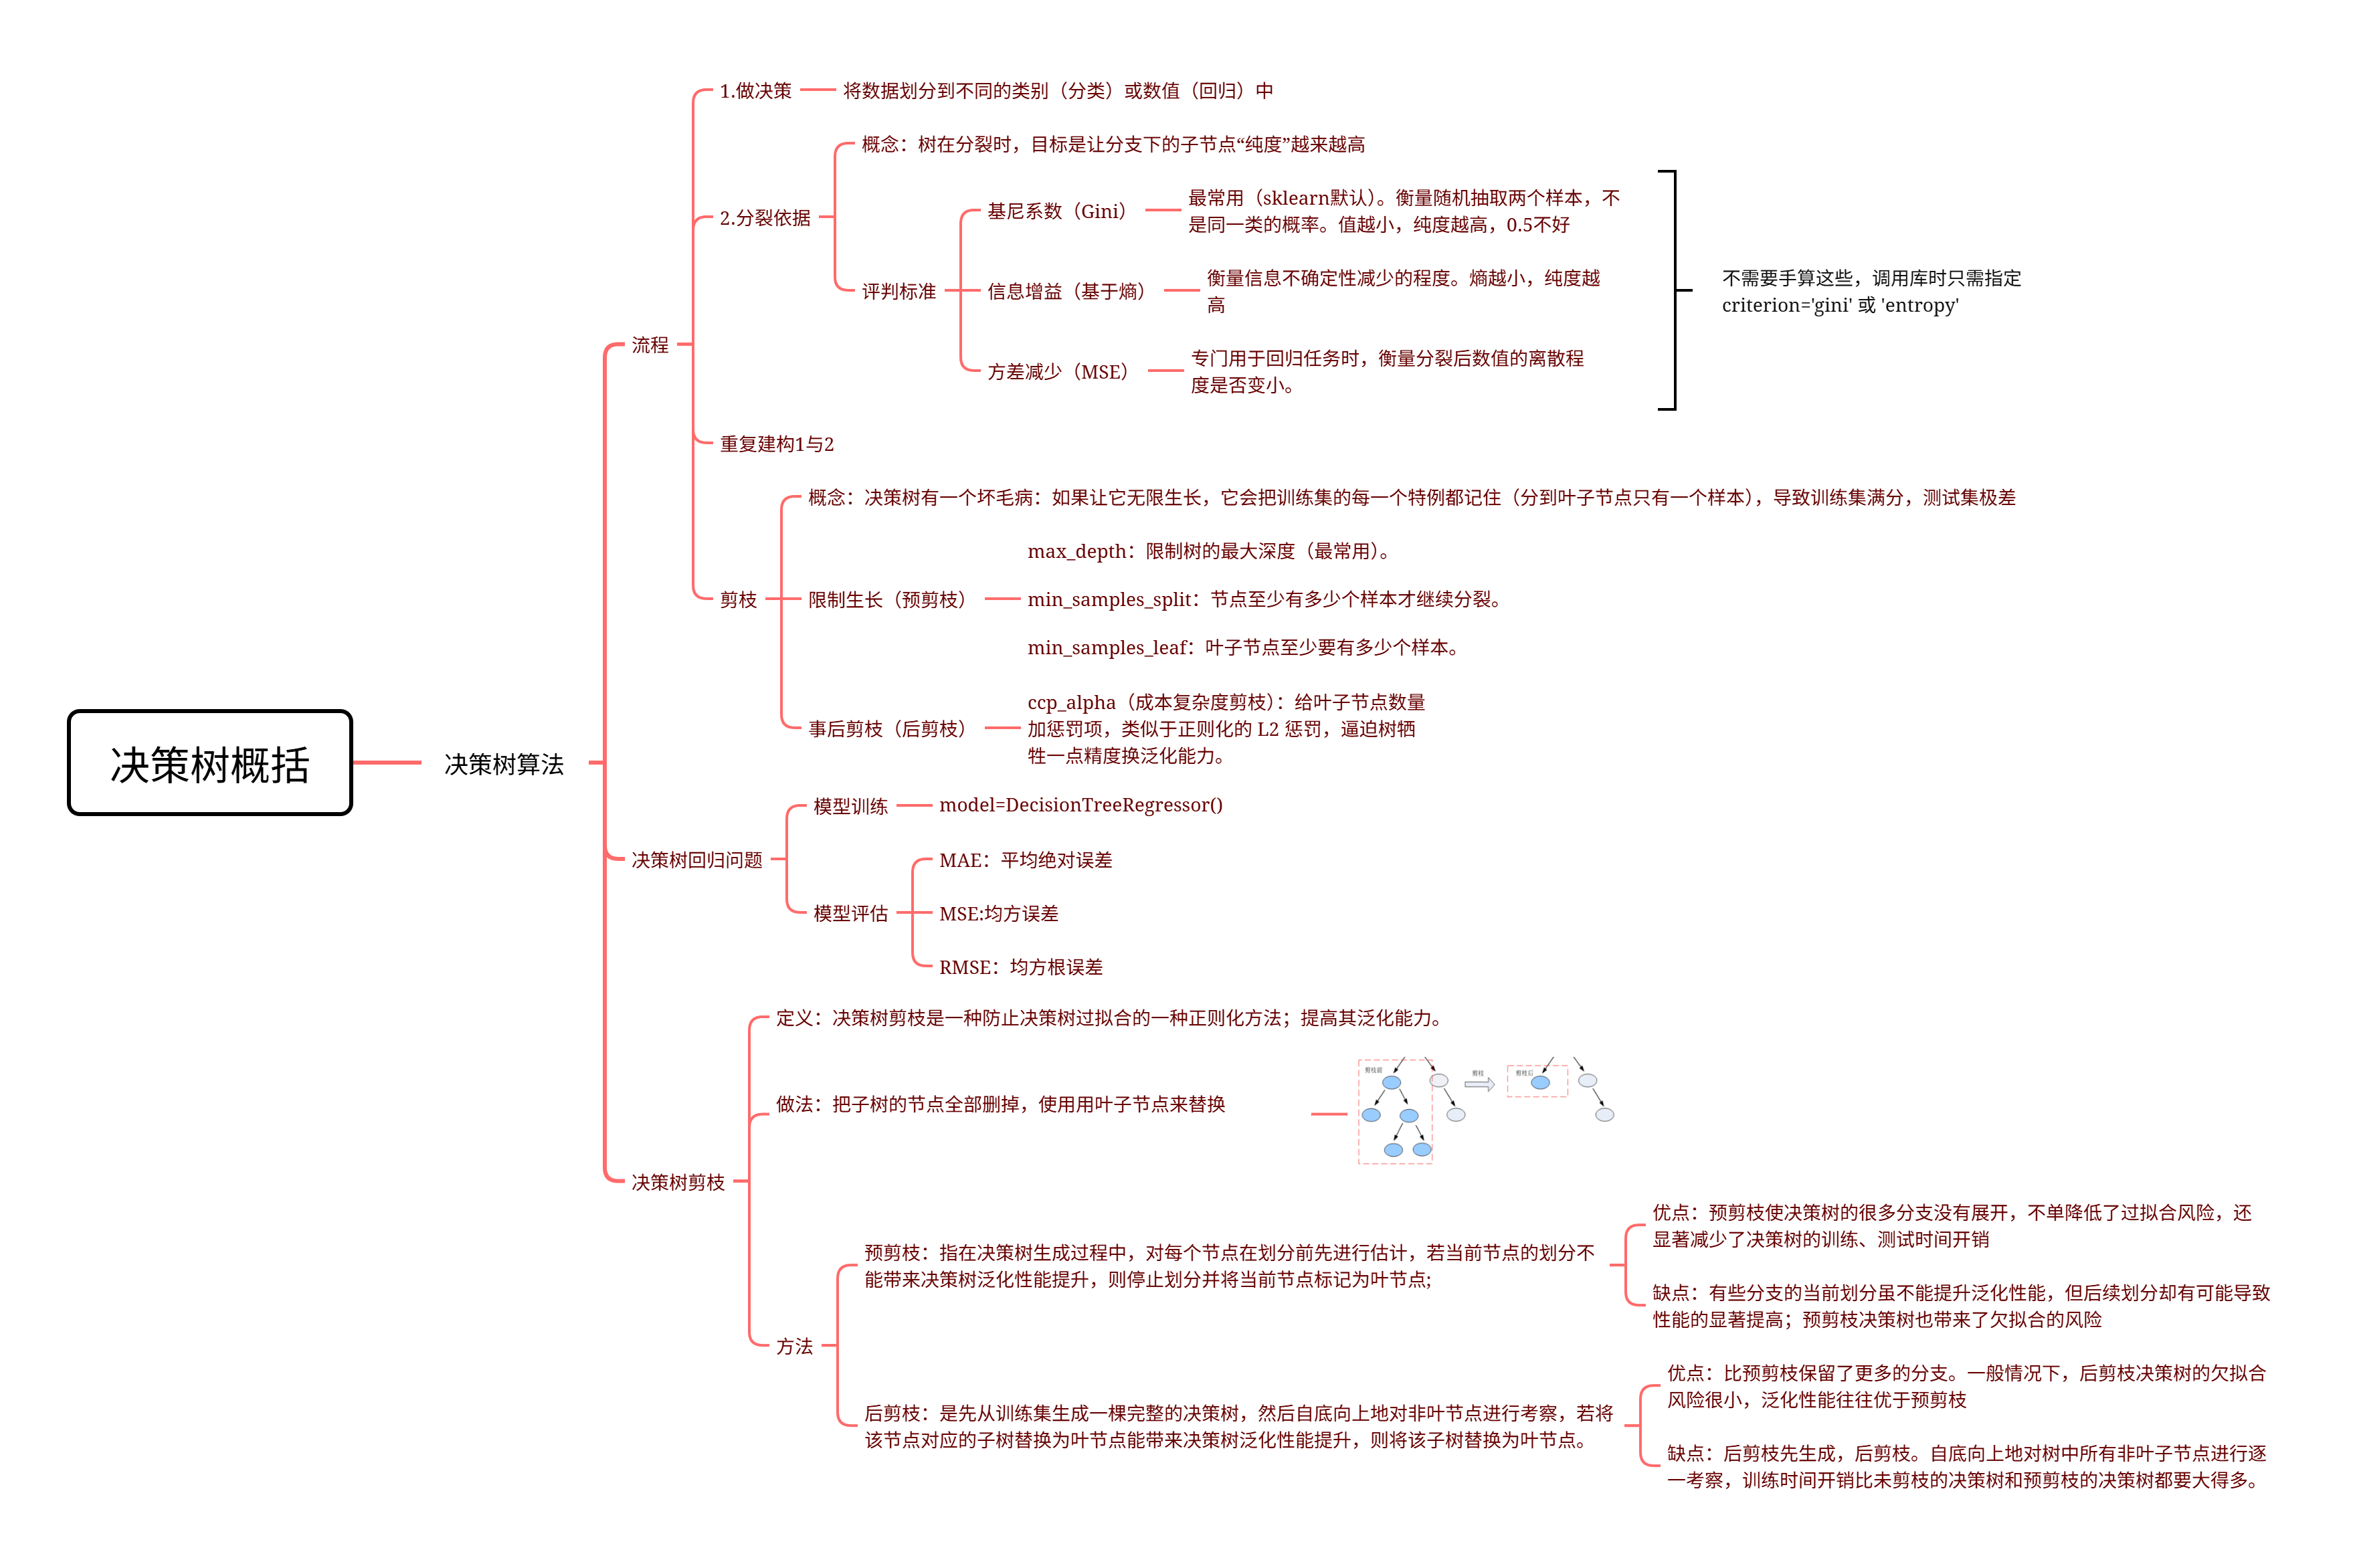
构建决策树的流程:
1.强制二分
分类问题:是xxx/不是xxx
回归问题:x>=30 / x<30
2.选择有价值的指标
gini值 = 2(p正)(1-p正),基尼值越小表示划分的质量越高
信息增益熵 = (p正*n正)+(p反 *n反)/(n正+n反)
3.重复1,重复逐层划分
4.剪枝
防止过拟合,设置最大层数,设置叶子节点的数量,设置分裂的最小数量...
model = DecisionTreeClassifier()
独热编码 - one-hot
新数据 = pd.get_dummies(数据)
eg:
sex = ['male','female'] -> sex_male =[True,False] , sex_female = [True,False]
总结: 1.讲算法原理(不是必须的)    2.直接用API

import pandas as pd
from sklearn.model_selection import train_test_split
from sklearn.tree import DecisionTreeClassifier, plot_tree
import matplotlib.pyplot as plt
from sklearn.metrics import accuracy_score, precision_score, recall_score, f1_score, classification_report

# 1.准备数据
# 1.1 - 加载数据
df = pd.read_csv('titanic_train.csv', sep=',', encoding='utf-8')
# print(df.head())
# df.info()
# 1.2 - 数据清洗(删除,填充)
# 选出有用的特征
x = df[['Pclass', 'Age', 'Sex']]
x = x.copy()  #防止修改的时候警告
y = df['Survived']
# 填充年龄
x['Age'] = x['Age'].fillna(x['Age'].mean()) #如果x不拷贝一份,修改原数据会有警告
# (独)热编码 one-hot -> 字符串转化成布尔值(等于转成了一个数值)
x_new = pd.get_dummies(x)
print(x_new)

# 2.特征工程(不需要)
# 3.数据划分
x_train, x_test, y_train, y_test = train_test_split(x_new, y, test_size=0.2)
# 4.模型训练
model = DecisionTreeClassifier()  #没有限制树的增长,可以用网格搜索+交叉验证寻找最优超参
model.fit(x_train, y_train)
# 5.模型预测
y_pre = model.predict(x_test)
# 6.模型评估(混淆矩阵)
print('准确率:', accuracy_score(y_pre, y_test))
print('精确率:', precision_score(y_pre, y_test, pos_label=1))
print('召回率:', recall_score(y_pre, y_test, pos_label=1))
print('f1值:', f1_score(y_pre, y_test, pos_label=1))
print('分类报告:', classification_report(y_pre, y_test))

# 总结:
# 1.加载csv(数据缺失,需要数据清洗)
# 2.特征选择
# 3...DecisionTreeClassifier
# 4.分类模型评估报告 classification_report

# ---------------------------------------------------------------
# 决策树的绘制
plt.figure(figsize=(50, 50))
plot_tree(model, max_depth=50, filled=True)  # 不要绘制太多层
# 将绘制的内容保存成一张图片
plt.savefig('./titanic.png')
波士顿房价预测-决策树解决回归问题
API -
from sklearn.tree import DecisionTreeRegressor

评估指标 -
MAE
RMSE
MSE